Developers can now collaborate with stakeholders using the Netlify Drawer on branch deploys!
The Netlify Drawer has long enabled teams to discuss changes, make suggestions, and file issues from the context of Deploy Previews. These Deploy Preview environments are automatically generated for pull requests on your Git repository at unique URLs for each PR.
Some teams need a more stable URL to share with their quality assurance (QA) team and other stakeholders. Their Git workflow may include the use of a long-lived branch, like staging. Now these teams can point stakeholders to a long-lived subdomain—such as staging.example.com—with the Netlify Drawer on branch deploys.
If you’re already using branch deploys on your site, you can get started by updating Netlify Drawer settings at Site Settings > Build & deploy > Collaboration tools in the Netlify app. Read on for more details.
Get started with branch deploys
Branch deploys enable you to create unlimited environments based on your Git branches. To set up branch deploys, go to Site Settings > Build & deploy > Branches and deploy contexts. Here you can choose to create branch deploys for all branches on the repo, or specific individual branches:
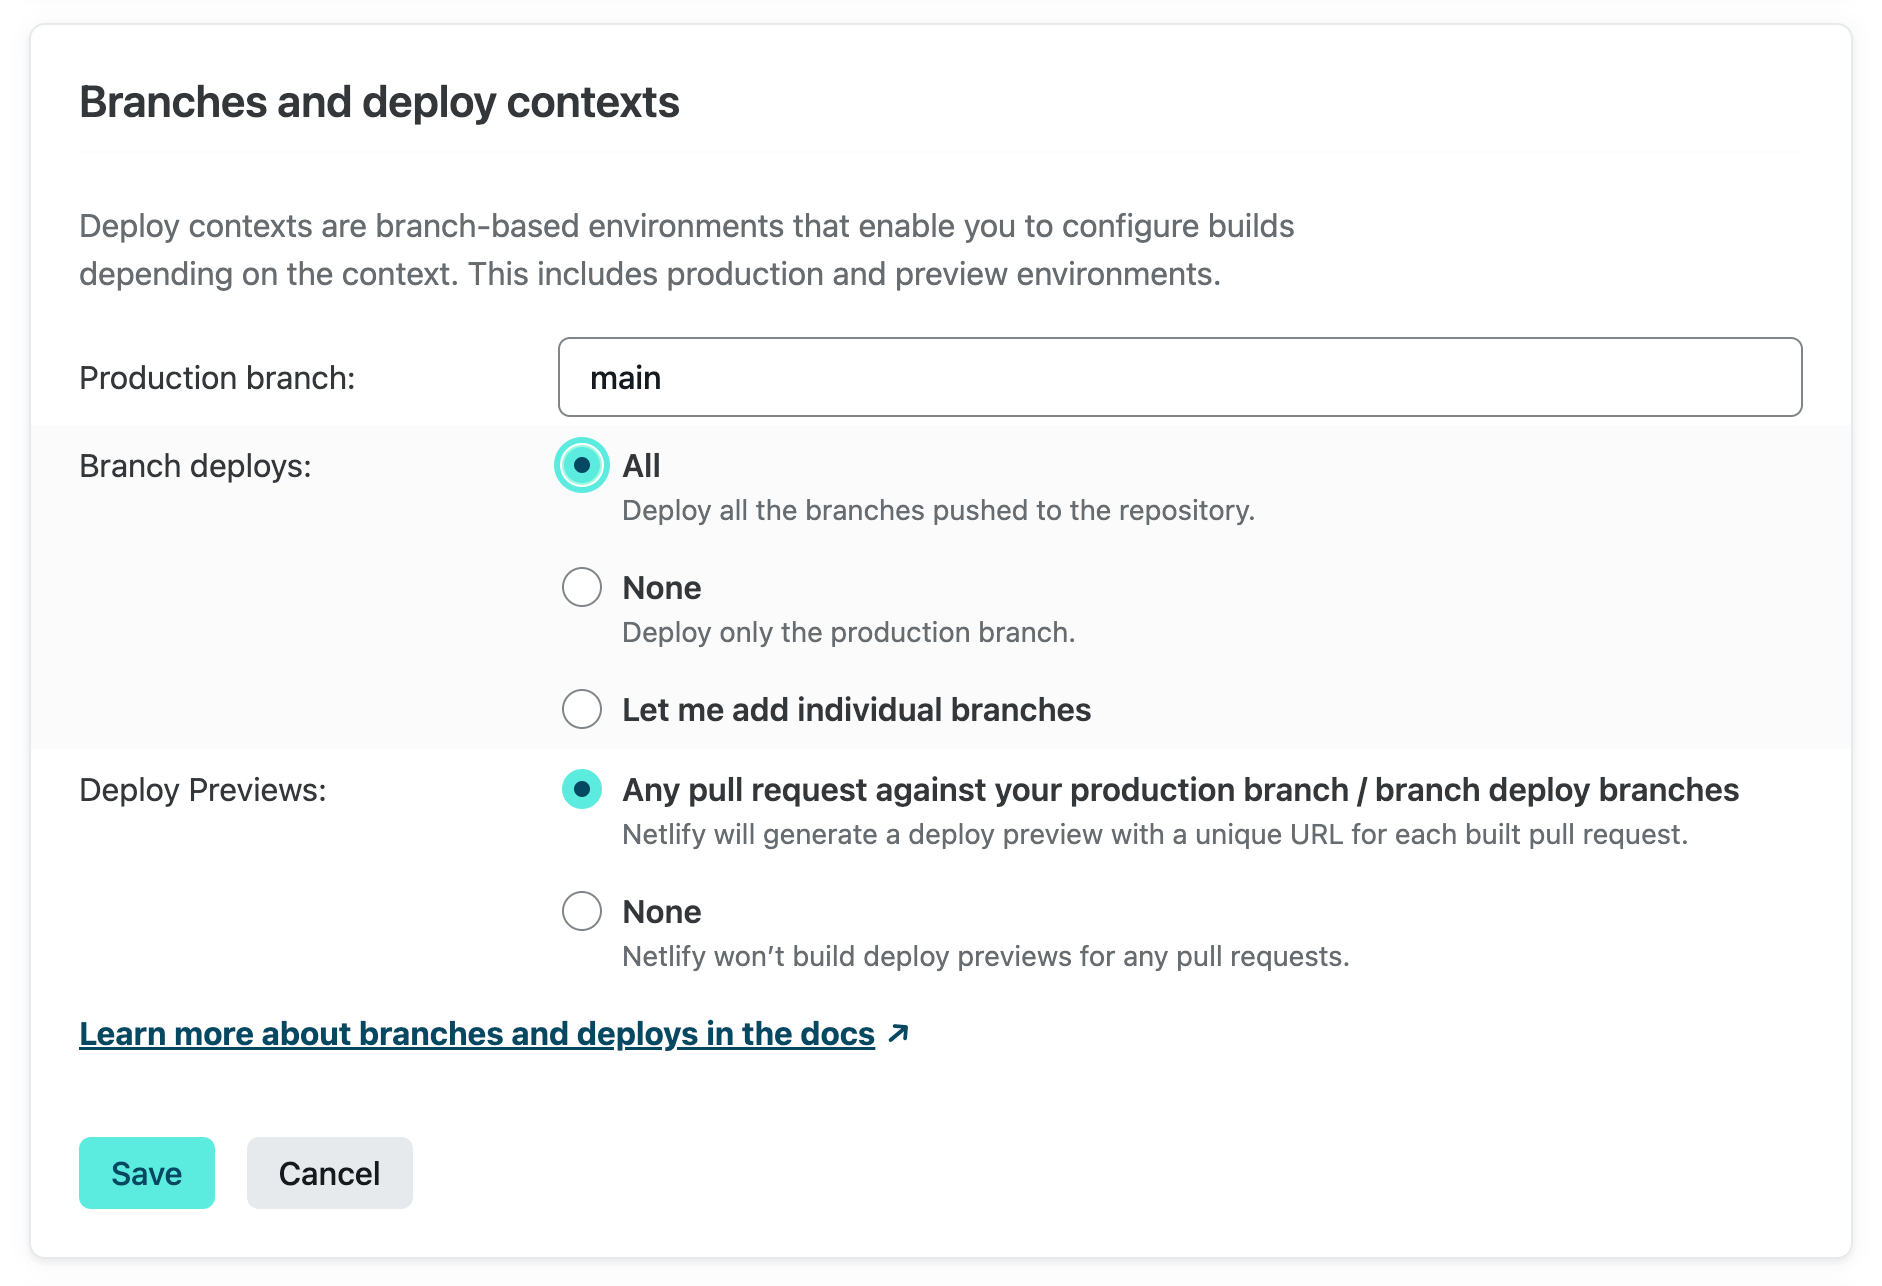
The next time you push to your staging branch, Netlify will automatically create a preview environment at staging--your-site.netlify.app. Developers using Netlify DNS to manage their Site’s custom subdomain can set up branch subdomains at Site Settings > Domain Management > Branch Subdomains:
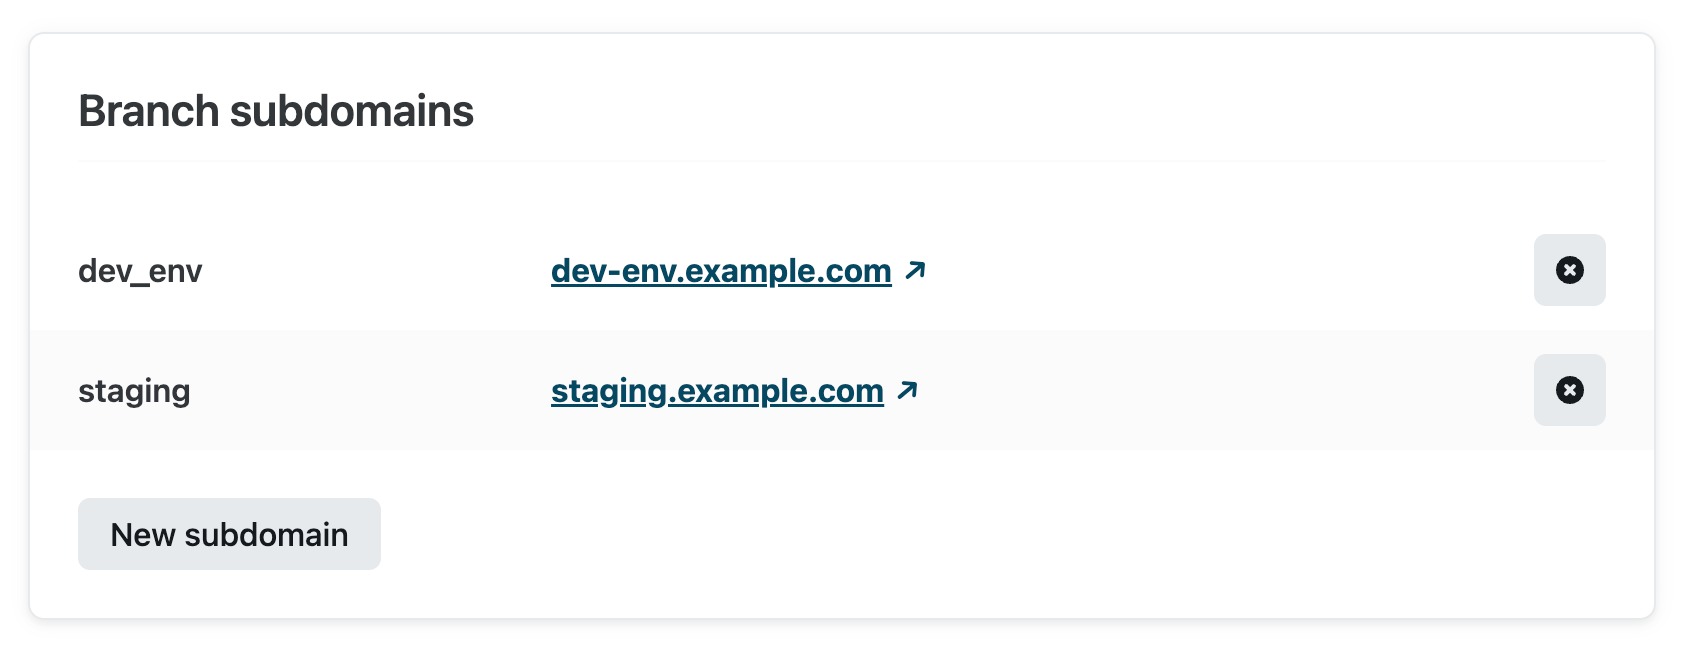
Whenever you push to staging, Netlify will rebuild your site and deploy it to staging--your-site.netlify.app and staging.example.com. These URLs will continuously reflect the state of the staging branch, so you can share them with whoever needs to sign off on changes before they are merged to production.
Collaborate on branch deploys
To enable the Netlify Drawer on branch deploys, go to Site Settings > Build & deploy > Collaboration tools:
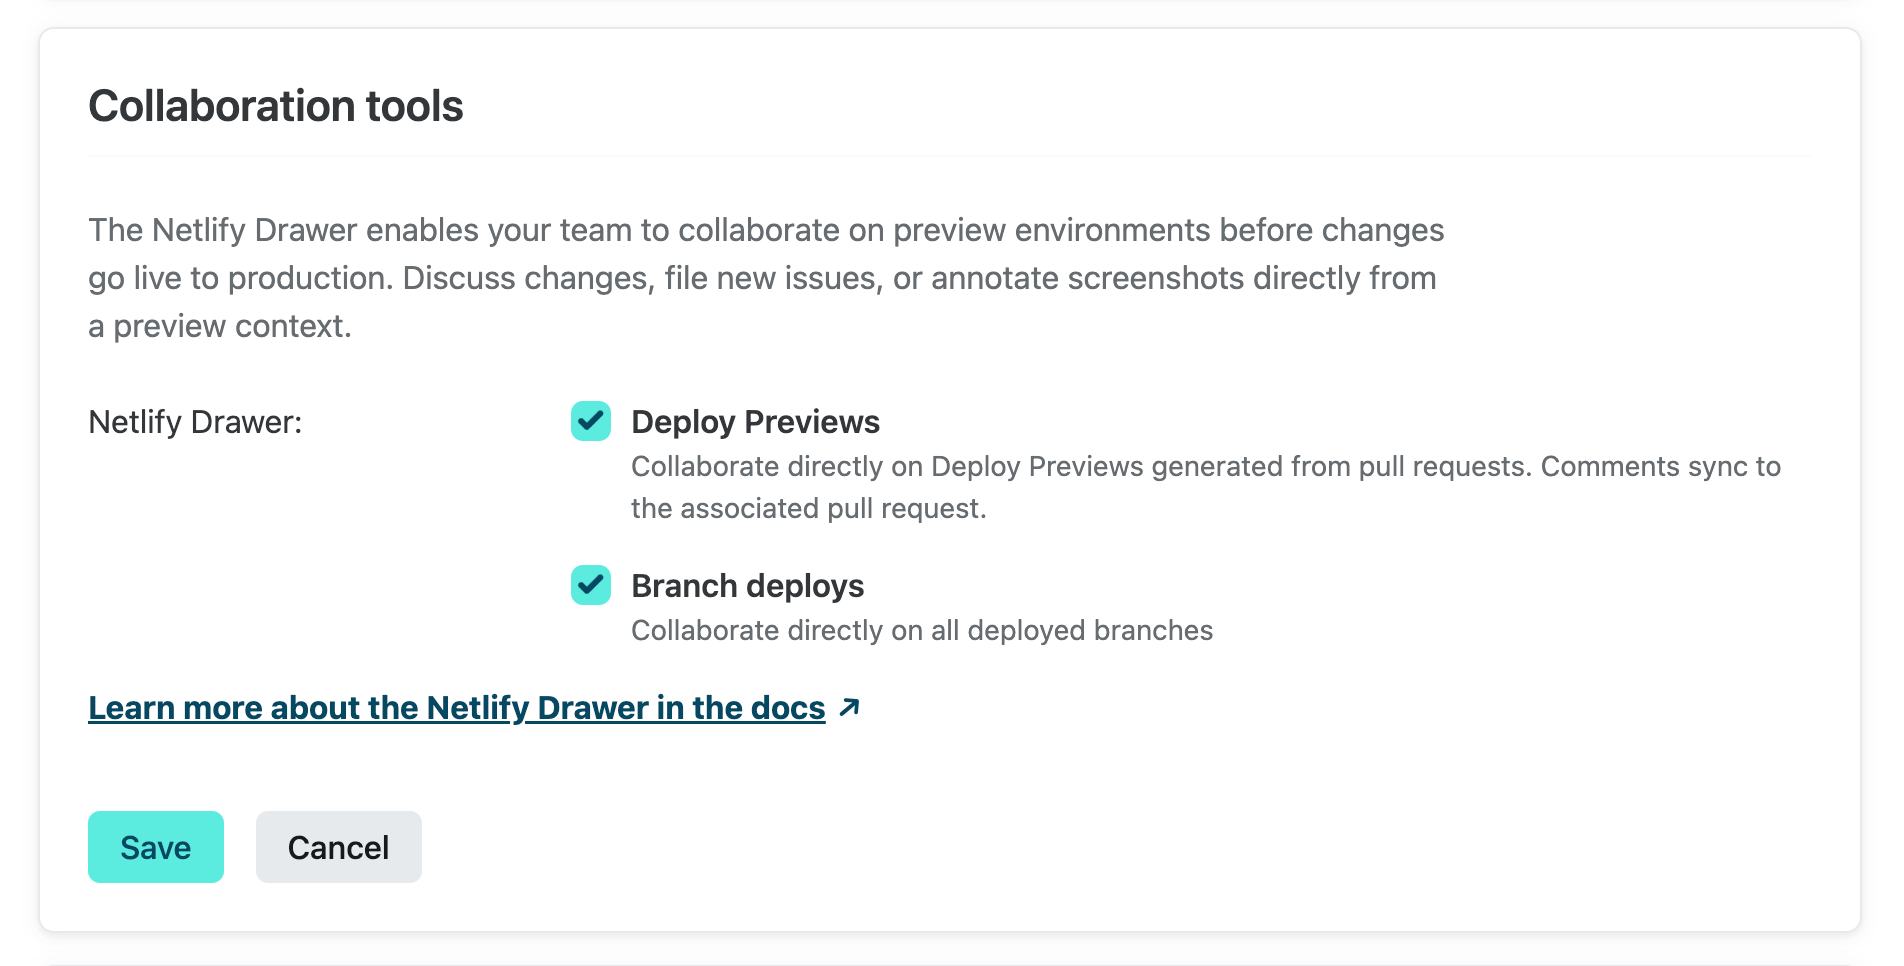
Update on January 23, 2023: previously, the Netlify Drawer was enabled by default on branch deploys that do not use custom domains. Based on customer feedback, it is now disabled by default. Thank you for sharing your thoughts!
Once enabled, you can visit a branch deploy from [your site] > Deploys on the Netlify app, sign into the Netlify Drawer, and start collaborating!
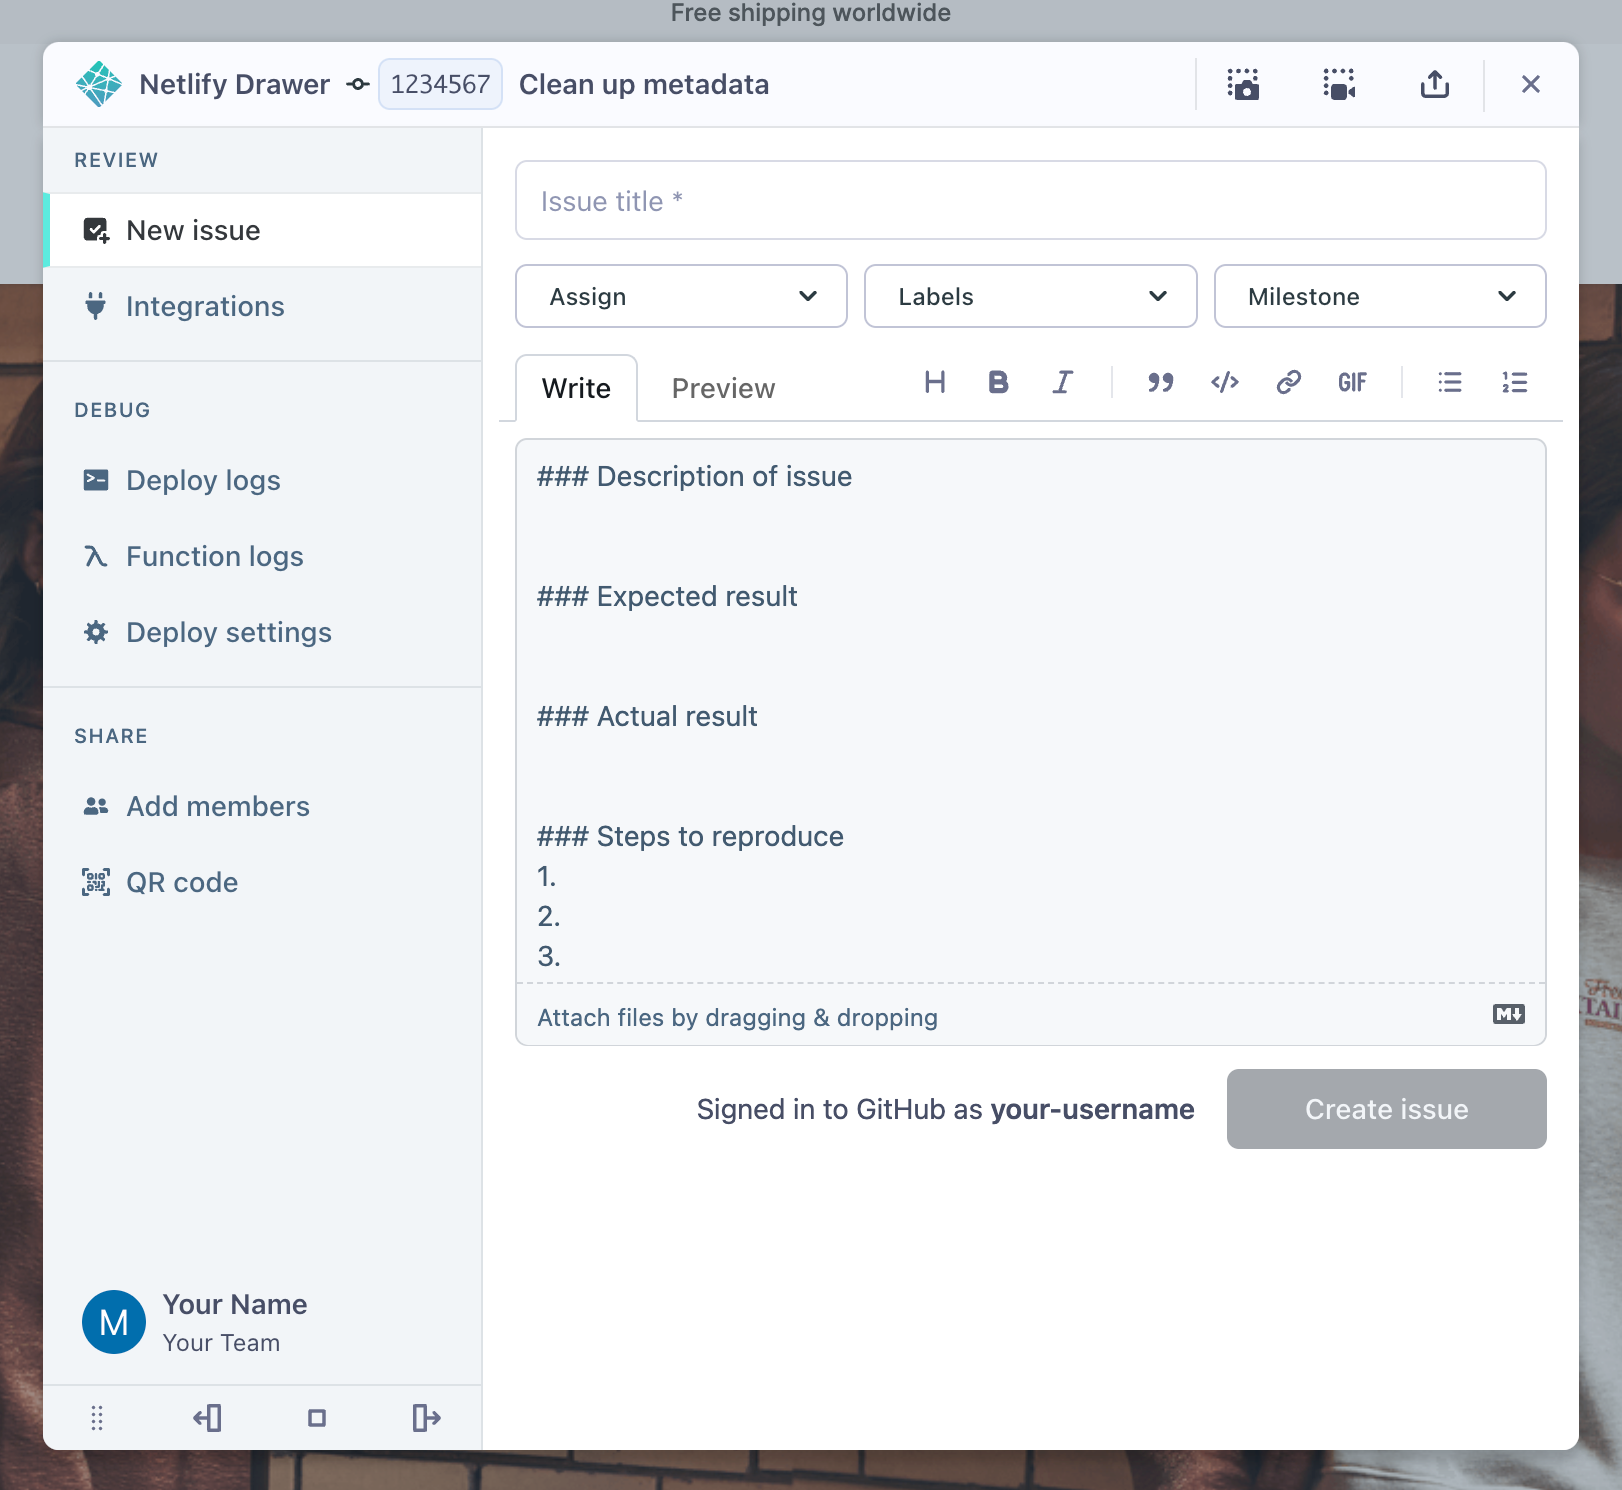
From here, you can:
- Connect third-party integrations, such as task management tools like Jira, Linear, Shortcut, or Trello
- Take a screenshot or record a video of your preview site, using either the built-in Netlify Drawer utilities or the Loom integration
- Open a new issue in your task management tools
- Check deploy logs and function logs for any errors
- Invite free Reviewers to join your Netlify team
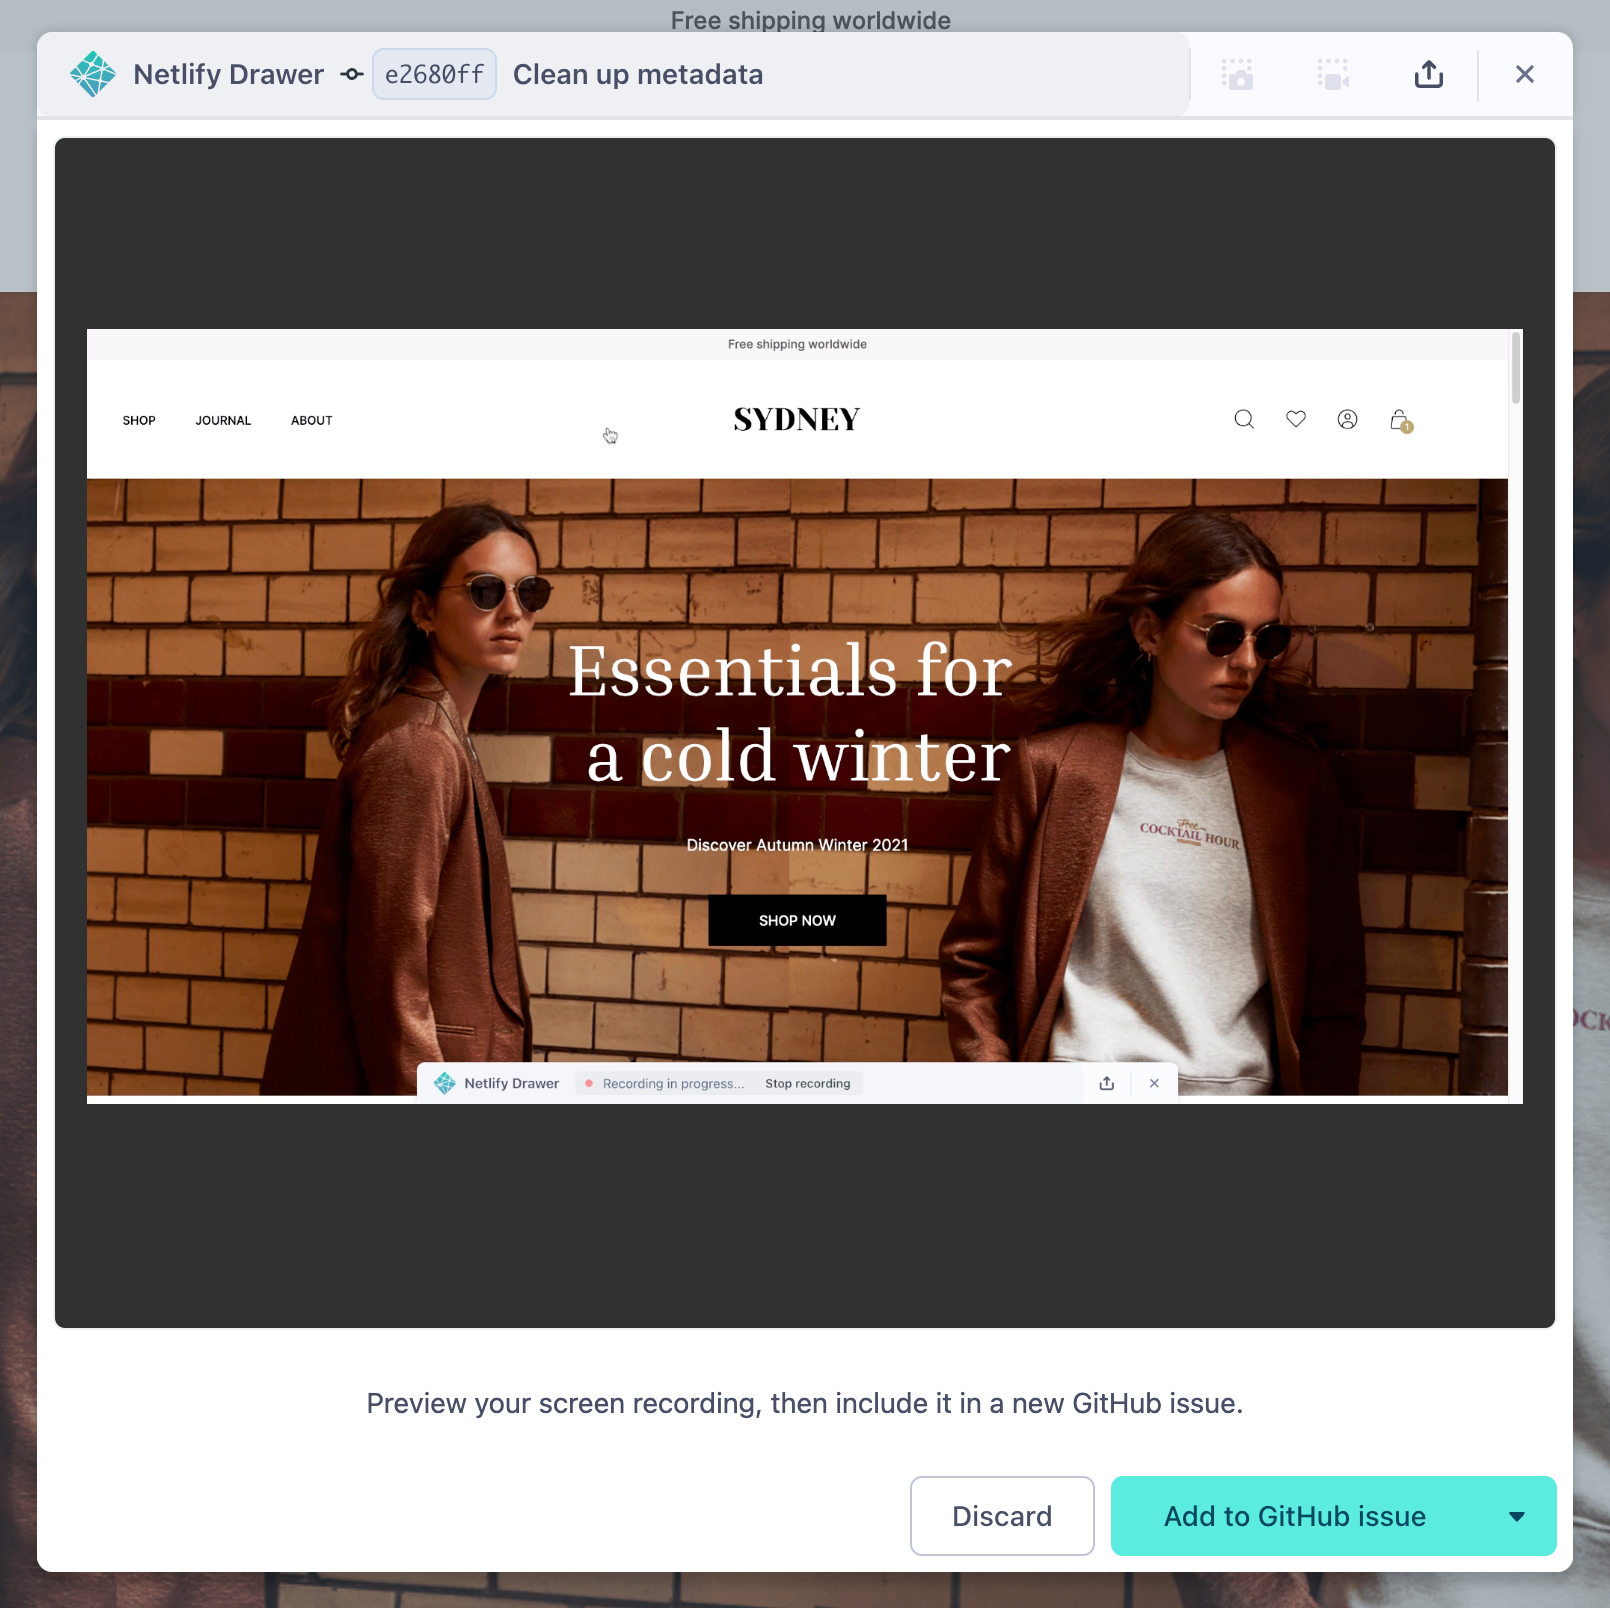
You can add a recording (above) or screenshot to new issues filed from the Netlify Drawer.
Note: The Conversation pane, where your team can discuss changes, is currently only available when you use the Netlify Drawer on deploy previews. When you’re using the Netlify Drawer on a deploy preview URL, any comments in the Conversation pane will sync back to the associated pull request in your Git repository.
Try it out today
Check your settings at Site Settings > Build & deploy > Collaboration tools and try out the Netlify Drawer on branch deploys! We are happy to hear what you think about these collaboration tools. Please feel free to share your thoughts on this short survey or in the Netlify support forums. Thank you for your feedback and happy collaborating!


