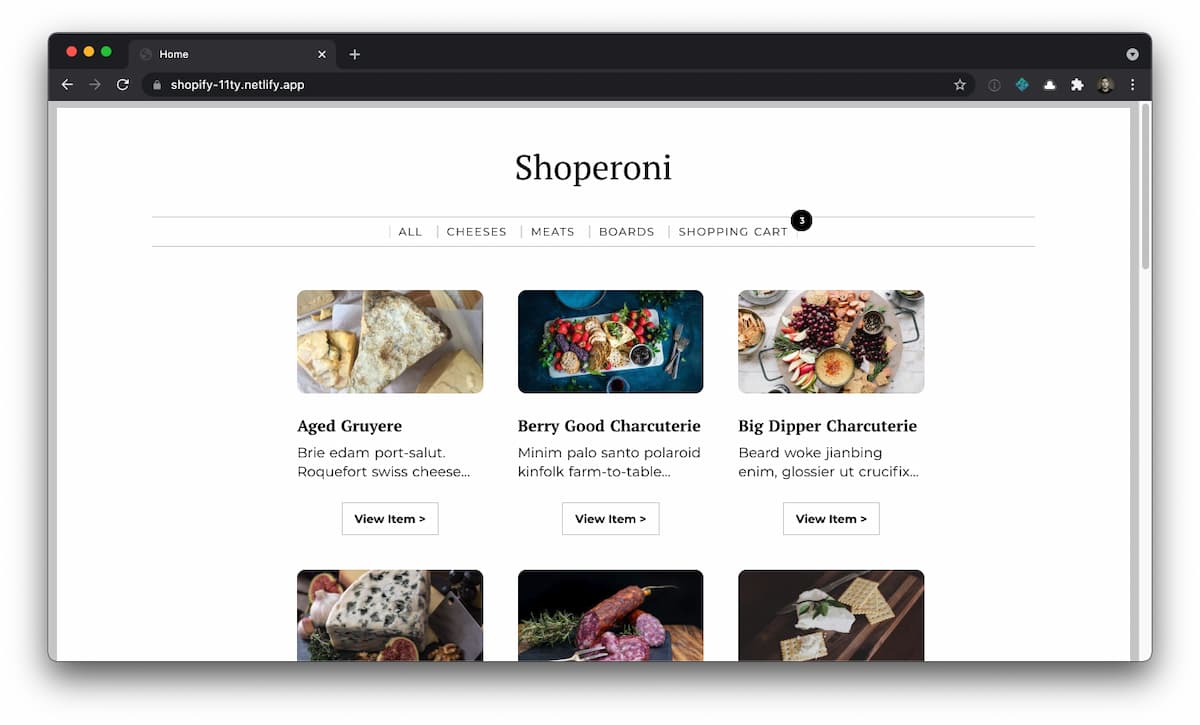
When Shopify expanded their Storefront API, they opened the door for developers to more easily build more of the shopping experience just as they (or their clients) desired.

The API provides great access to product, pricing and stock level data through an expressive GraphQL interface. And it also allows you to control the cart, enabling you to design and implement your shopping flow with far more control than was possible before.
It can be intimidating to start working with such a large and powerful API. And even though Shopify provide extensive documentation and an API explorer, there is a lot to dig in to. So the DX team at Netlify explored using the API and a variety of front-end tools and frameworks to build some reference templates to help get you started with using the Storefront API.
An example that suits you
You can lean more details and explore the examples built with other tools in these other posts:
- Shopify announces enhanced Storefront APIs - A first look with Gridsome and Netlify
- Using the Shopify Storefront API with Astro (coming very soon)
- Using the Shopify Storefront API with Nuxt (coming very soon)
- Using the Shopify Storefront API with Angular (coming very soon)
I was keen to use as little magic as possible, preferring the simplest tooling I could put my hands on to create the UI. For this reason I chose to use Eleventy to pull product data from the API and generate all the pages I needed during the build. And then added some HTML forms and JavaScript to interact with the API to add and remove things from the shopping cart. Shall we explore a little?
The demo site
We created an example Shopify store complete with products which… let’s just say that they reflect some of common interests of the DX team. You can explore the example site which uses uses the store data here:
Architectural overview
The user interface (UI) could have made calls directly to the Shopify API, but to make things easier to reuse and extend, we decided that we’d make some small utility functions which we could all use to connect our UIs to the Shopify API. Abstracting these to serverless functions meant that we could all have a simplified API for our sites which talked to Shopify for us. We wrote them once, and then each different UI could use them.
TIP: This small level of abstraction can really help when building your own front-end which consumes an API, as it means you can manage and normalize future changes in one place without disruptions to the code of your UI.
Utility functions as an API
To bring the experience to life, the UI would need just a few services. These became our site’s API end points provided by Netlify Functions. They were:
- Add an item to the cart — provided by add-to-cart.js
- Remove an item from the cart — provided by remove-from-cart.js
- Get the data of the current cart state — provided by get-cart.js
The pattern I chose for my site was that I’d pull all the product data I needed during each build, so rather than fetching this data for site pages at request time, I fetched that data from the Shopify API once during the build using an Eleventy data file.
- Fetch the product catalogue — products.js
I decided that the product listing pages and product detail pages were stable enough that they could all be generated at build time (we could use progressive enhancement to fetch and update latest pricing and stock levels if we wanted to). The cart page is a little different though. We can’t build and populate that at build time because the users will be manipulating that as they shop. We could render the cart client-side after making calls to our cart API, but I opted to keep my UI as dumb as I could and instead make a traditional synchronous request for the cart page which would be rendered for me on-demand by a serverless function.
- Show a page view of the cart —cart-view.js
Making URLs palatable
Ok fine. I admit it. I’m a URL snob. I like to see friendly, obvious, readable URLs whenever possible. And with this model that’s very practical, so let’s make the URLs that our site uses to access our API layer nice and obvious. Step forward Netlify’s redirects API!
Adding these lines to the netlify.toml file means that we can talk to the serverless functions with some lovely clarity. Good for the developer (fetch('/api/add-to-cart', data); ) and good for the user (/cart).
[[redirects]]  from = "/api/*"  to = "/.netlify/functions/:splat"  status = 200
[[redirects]]  from = "/cart"  to = "/.netlify/functions/cart-view"  status = 200
Seasoning with JavaScript
The route I chose took me a long way towards making this site work without depending on any client-side JavaScript. Once all of the pages were available and populated as expected, I added a small amount of client-side JavaScript to manage things like:
- Add items to the cart and show how many items it currently contains
- Use localStorage to keep track of the current cart ID created by Shopify, so further shopping goes into the same cart
- Enable asynchronous requests to add items to the cart instead of using a traditional form submit
All of this client-side JavaScript amounted to around 80 lines of commented code. No libraries or frameworks here, but you could of course choose to leverage any framework you like to gain access to some richer UI goodies instead of needing to roll your own.
Build it your way
This decoupled model, where the presentation layer is independent of the underlying e-commerce services, and not coupled to the hosting infrastructure, means that you fantastic levels of control when crafting the experience you want for the users of your site.
Agencies spend a great deal of effort designing engaging and effective experiences for their clients. And by expanding the Storefront API, Shopify have greatly improved the path to delivering on the promises of these designs so that the experiences are delivered to customers as intended, and generate differentiation and competitive advantages through the user experience, whatever technologies are used to build them.
Poking around
You can explore this reference template to learn more — it is available on GitHub.
The example was also designed not to need any secrets or sensitive keys, so you can also clone this project and build it locally (or deploy as a new site on Netlify) in a couple of clicks of the button below.


